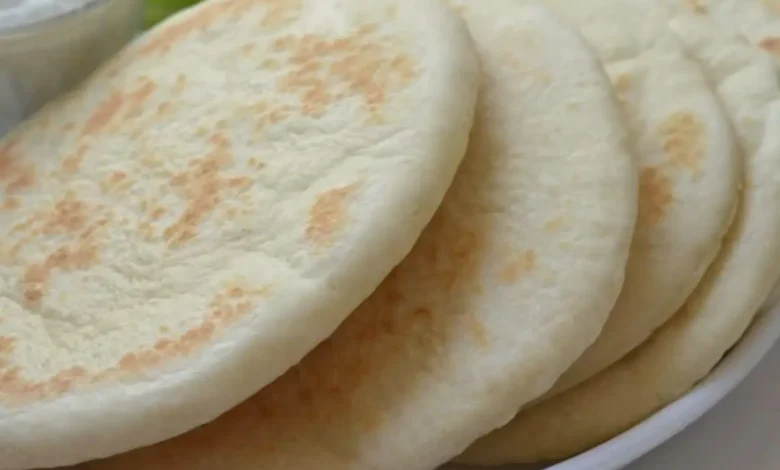
Arabic Pita Bread, also known as “Khobz” in Arabic, is a centuries-old staple in Middle Eastern cuisine. Its humble beginnings date back to ancient times, where it served as the foundation of many meals. This flatbread is characterized by its round shape, soft texture, and distinct pocket in the center.
The history of Arabic Pita Bread is as fascinating as its taste. It has been a dietary mainstay in the Middle East for thousands of years, with roots dating back to ancient Egypt.
Early civilizations baked flatbreads over open fires, a practice that has evolved into the modern pita-making techniques we know today.
The Versatility of Arabic Pita Bread
One of the charms of Arabic Pita Bread is its incredible versatility. It serves as a blank canvas for a variety of dishes and can be enjoyed in numerous ways.
From Breakfast to Dinner
Start your day with a delightful Arabic Pita Bread sandwich filled with creamy hummus, fresh vegetables, and a sprinkle of sumac. For dinner, use it as a base for savory shawarma or kebabs. The possibilities are endless.
A Perfect Pocket
The unique pocket in Arabic Pita Bread is a culinary marvel. It’s perfect for stuffing with your favorite ingredients, making it a convenient and delicious option for on-the-go meals.
Crafting the Perfect Arabic Pita Bread
Creating authentic Arabic Pita Bread requires skill and patience. The dough is made from simple ingredients like flour, water, yeast, salt, and a touch of olive oil.
What sets it apart is the way it’s baked. Traditionally, Arabic Pita Bread is baked in a stone-lined oven, resulting in the perfect balance of crispness and softness.
Savoring the Flavor
The taste of Arabic Pita Bread is an experience in itself. Its mild, wheaty flavor complements a wide range of dishes. The best part is its ability to enhance the flavors of fillings and spreads.
Freshly Baked Goodness
There’s nothing quite like the aroma of freshly baked Arabic Pita Bread wafting through your kitchen. The warm, slightly nutty scent is a promise of the delectable meal to come.
Homemade Arabic Pita Bread Recipe
Ingredients
- 2 1/4 teaspoons active dry yeast
- 1 teaspoon sugar
- 1 cup warm water (110°F or 43°C)
- 2 1/2 cups all-purpose flour
- 1 teaspoon salt
- 2 tablespoons olive oil
Instructions
1. Activate the Yeast

In a small bowl, combine the warm water, sugar, and yeast. Let it sit for about 5-10 minutes until it becomes frothy. This indicates that the yeast is activated and ready for use.
2. Prepare the Dough

In a large mixing bowl, combine the flour and salt. Make a well in the center and pour in the activated yeast mixture and olive oil. Stir until a rough dough forms.
3. Knead the Dough
Turn the dough out onto a lightly floured surface and knead it for about 5-7 minutes until it becomes smooth and elastic. You can add a little more flour if it’s too sticky.
4. First Rise
Place the dough in a lightly greased bowl, cover it with a clean kitchen towel or plastic wrap, and let it rise in a warm, draft-free place for about 1 to 1.5 hours, or until it has doubled in size.
5. Divide and Shape

Once the dough has risen, punch it down to release the air. Divide it into 8 equal portions and shape each portion into a ball. Using a rolling pin, flatten each ball into a 6-8 inch (15-20 cm) circle. You can make them slightly thicker if you prefer.
6. Second Rise
Place the flattened dough circles on a baking sheet lined with parchment paper and cover them with a clean kitchen towel. Allow them to rest and rise for about 15-20 minutes.
7. Cook on the Stovetop

Heat a non-stick skillet or frying pan over medium-high heat. You don’t need any oil. Once the pan is hot, place one of the flattened dough circles in the pan and cook for about 1-2 minutes on each side. You’ll see it puff up and get brown spots.
If you have a pizza stone, carefully transfer the dough circles onto the hot stone in the oven. Alternatively, you can bake them directly on the baking sheet. Bake for about 3-4 minutes, or until they puff up and turn golden brown.
8. Cool and Serve
Remove the pita bread from the oven and let it cool for a few minutes. They will naturally deflate as they cool. Serve them warm with your favorite dips, and fillings, or use them as a base for sandwiches.
Enjoy your freshly baked Arabic Pita Bread! It’s perfect for dipping into hummus, serving with grilled meats, or filling with your favorite ingredients for a scrumptious sandwich.
More Arabic Pita Bread Recipes
Now that you’re acquainted with the history and versatility of Arabic Pita Bread, it’s time to put your culinary skills to the test. Here are some mouthwatering recipes that showcase the incredible potential of this ancient bread:
1. Classic Hummus and Falafel Pita
Transform your Arabic Pita Bread into a classic Middle Eastern delight. Fill it with creamy hummus, crispy falafel, fresh cucumbers, and a drizzle of tahini sauce.
2. Chicken Shawarma Wrap
Experience the flavors of the Levant with a chicken shawarma wrap. Marinated chicken, pickles, garlic sauce, and Arabic Pita Bread unite for a taste explosion.
3. Vegetarian Delight
For a lighter option, stuff your Arabic Pita Bread with grilled vegetables, feta cheese, and a balsamic glaze. It’s a wholesome treat for vegetarians.
4. Sweet Endings
Don’t forget the sweet side of Arabic Pita Bread. Create a dessert wrap with Nutella, bananas, and a sprinkle of powdered sugar.
More Recipes
Arabic Pita Bread

One of the charms of Arabic Pita Bread is its incredible versatility. It serves as a blank canvas for a variety of dishes and can be enjoyed in numerous ways.
- 2 1/4 teaspoons active dry yeast
- 1 teaspoon sugar
- 1 cup warm water (110°F or 43°C)
- 2 1/2 cups all-purpose flour
- 1 teaspoon salt
- 2 tablespoons olive oil
- In a small bowl, combine the warm water, sugar, and yeast. Let it sit for about 5-10 minutes until it becomes frothy. This indicates that the yeast is activated and ready for use.
- In a large mixing bowl, combine the flour and salt. Make a well in the center and pour in the activated yeast mixture and olive oil. Stir until a rough dough forms.
- Turn the dough out onto a lightly floured surface and knead it for about 5-7 minutes until it becomes smooth and elastic. You can add a little more flour if it’s too sticky.
- Place the dough in a lightly greased bowl, cover it with a clean kitchen towel or plastic wrap, and let it rise in a warm, draft-free place for about 1 to 1.5 hours, or until it has doubled in size.
- Once the dough has risen, punch it down to release the air. Divide it into 8 equal portions and shape each portion into a ball. Using a rolling pin, flatten each ball into a 6-8 inch (15-20 cm) circle. You can make them slightly thicker if you prefer.
- Place the flattened dough circles on a baking sheet lined with parchment paper and cover them with a clean kitchen towel. Allow them to rest and rise for about 15-20 minutes.
- Heat a non-stick skillet or frying pan over medium-high heat. You don’t need any oil. Once the pan is hot, place one of the flattened dough circles in the pan and cook for about 1-2 minutes on each side. You’ll see it puff up and get brown spots.
If you have a pizza stone, carefully transfer the dough circles onto the hot stone in the oven. Alternatively, you can bake them directly on the baking sheet. Bake for about 3-4 minutes, or until they puff up and turn golden brown.
- Serve them warm with your favorite dips, and fillings, or use them as a base for sandwiches.
FAQs
Can I make Arabic Pita Bread at home?
Absolutely! Homemade Arabic Pita Bread is a rewarding endeavor. You can find plenty of recipes online to guide you through the process.
What’s the difference between Arabic Pita Bread and regular pita?
Arabic Pita Bread is typically thinner and softer than its Greek or Mediterranean counterparts, making it ideal for folding and stuffing.
Can I freeze Arabic Pita Bread?
Yes, you can freeze Arabic Pita Bread to extend its shelf life. Just ensure it’s well-sealed to prevent freezer burn.
Is Arabic Pita Bread gluten-free?
No, traditional Arabic Pita Bread is not gluten-free as it’s made from wheat flour. However, gluten-free alternatives are available.
What is the best way to reheat Arabic Pita Bread?
To restore the freshness of Arabic Pita Bread, wrap it in a damp towel and heat it briefly in the oven or on a hot skillet.
Can I use Arabic Pita Bread for sweet dishes?
Absolutely! Arabic Pita Bread is a versatile canvas for both savory and sweet creations. Try it with chocolate, fruits, or honey for a delightful dessert.
Final Thoughts
Arabic Pita Bread is a symbol of tradition, flavor, and creativity. Whether you’re savoring it in a classic falafel sandwich or crafting a unique dessert, this versatile bread brings joy to every meal.
Explore its rich history and let your taste buds dance to the rhythm of Middle Eastern cuisine. So, why wait? Dive into the world of Arabic Pita Bread and embark on a culinary adventure like no other.